(Apologies for the lousy photos! I used my phone camera for most of these, but you can still get the basic ideas I’m trying to share!)
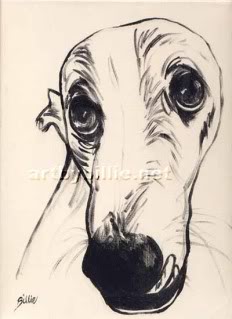
An artist friend of mine, Billie, did this sweet little Etude of my darling Wabi,
which I insisted we trade for.
Those of you who know me have heard allllll about my total artistic block, lately (for most of the last year!) What to do?? I wanted to do a portrait of her little Buddy dog, but … there’s that little issue of The BLOCK! :^P
I had decided to try some new media, new anything, to see if I couldn’t loosen up The Block. I wanted to do some sculpture, and paper mache seemed like a pretty inexpensive way to achieve 3-D without dipping into the bank account during the learning curve.
I decided to try a “bust” of Buddy, hopefully getting across a particular expression that Billie likes,
showing his little lower canines sticking up (like my own Wabi’s!)
I played around some with making pulp, which was fun, but it was so goopy and rough. I experimented with building up using wadded paper, then paper strips,
then details in the pulp …
Maybe the toilet paper core wasn’t such a good idea for the muzzle!
Or just pure pulp …
(Yes, that’s a mouse, not Buddy! I said I was experimenting!)
😛 Not too happy with any of this! (There’s that learning curve, eh? Well, hopefully there’s a curve!)
So, I did some research, and came across this marvelous artist doing fabulous paper mache sculpture. Luckily for me, Jonni also posts tutorials in her blog. Bingo. I decided to try out her techniques on my portrait of Buddy.
With the experience of two failed heads behind me already, and the weirdness of the idea of a dog’s head on a base (hang it on the wall like a hunting trophy? set it on the coffee table staring up at you?), I decided to go for the whole body pose.
“Rub my tummy!” Love it!
Using Jonni’s technique of the cardboard cut out guide and armature, I drew out cross-sections of the body with the neck and head, then all four legs and the tail, and cut them out of cardboard.
Then I started adding wads of paper, keeping in mind the underlying muscles and bones, etc., wrapping it all together at this stage with masking tape.
Know what? Masking tape is sticky! 😛 Kind of a pain when one hand is trying to hold a wad of paper that wants to unwad and fall off, and the other is trying to tear off a useable piece of sticky tape, and then put it somewhere other than your hand! But, how fun to see the flat cut-outs become the fully dimensional dog, even at this rough stage!
Here it is, pretty well taped up and ready for the first layer of paper mache:
I decided early on that I’d forgo the details like toes and claws, and concentrate that level of detail in the face. I did, however, decide I couldn’t leave out his little hoo-hoo. So, there it is. (Funny story about that. I had to remove it and start over as it got … quite large, with the added layers of paper! A bit too … erm … distracting.)
Jonni says she likes to use brown paper bags, but apparently Trader Joe’s uses mighty thick paper. It was very unfriendly. I happened to have a lot of white newsprint-type paper that came to me as packing material. It made wonderful paper mache; very melty, and looked so nice right off the bat. Kind of like porcelain.

At this stage, I had to give it a rest to dry. But I just was NOT happy with this head! It was too big. It looked like a Boston bull terrier or a flying pig. Well, one of my mottos is, If it’s not right, it’s not right. The next morning, I took my bread knife, and decapitated poor Buddy.
Yet one more head to the waste pile!
I was especially not looking forward to doing the ears over. That was a process of using stiffer paper (a flour bag, in this case), cutting out an ear shape, with tabs to attach it to the head, curling it around, and taping it down, before building it up with paper mache. Tricky, but at least I had learned to tear up lots of tape bits to be ready when needed!
Okay, so I redid a smaller, narrower muzzled cardboard armature, wadded and taped it up, leaving room for the bulbous eyes to be added on as details, which is part of where I’d gone wrong before.

Paper mached the skin, detailed the eyes and muzzle, got those ears done. The eyes I tried to get to show the white cornea/inner lid (whatever that is!), so the direction of the gaze would be obvious when painted later. The eyelids and eyebrows were liberally soaked and shaped from paper and the flour paste. See below for a close-up of the face details.
I found a paintbrush extremely useful for forming the paper into tight areas, like around the eyes, ears, nostrils, lips, and in the folds where the limbs join. I also ended up keeping a damp rag near to occasionally wipe off the accumulated goop drying on my hands and between my fingers.
Break for drying. Oh yeah! I put Buddy in the oven to dry at 225’ F, as suggested in Jonni’s tutorials. Do you know the smell of toasting paper and flour? That smell right before it catches fire? ;P Buddy was too big to truly fit, so I had to leave the door open a bit, and tented with foil to hopefully keep most of the heat in. I think it confused the thermostat. Anyway, it didn’t actually burn, just … got dark and toasty, and only in a couple places!
At this point, Jonni suggests using joint compound (used on drywall, before painting) to smooth out the sculpture. That was the part I was very interested to try, since smoothing was a big concern of mine. I ended up spreading it on full strength (not diluting it as suggested), mostly with the back of a spoon, and smoothing it with a damp paintbrush. The challenge, as it turned out was to avoid getting little voids or bubbles under a skin of compound that showed up later when sanded. But it was fun!
Sanding was less fun, but very rewarding, nonetheless.
Next layer of paper mache went pretty quickly, but I took the opportunity to fill in some areas that I thought were skimpy. Especially the belly, which I wanted to be irresistibly round. Then I wanted to do yet another smoothing layer of joint compound. Then sanded again. At this point, H commented, “This project is getting a little obsessive, isn’t it?” Heh heh! Well, I was using it to learn, too!
Maybe he was objecting as much to the total use of the kitchen counter for several days. ☺
Finally time to prime! Since the primer is white, and so is the joint compound, I wanted to see where the primer was, so I tinted it with India ink. Buddy is mostly black, so I figured that would get me that much closer, anyway.

I rested him on a pillow wrapped in a plastic bag while I worked on the underside, to protect his breakable top side stuff (legs, ears, facial details).
Once Buddy was all primed, the surface looked to me like ceramic, or plaster. Like a bronze casting positive. I said so to H, who had apparently said so some time before, and I forgot. (Xan forgot something? SO unlike me!) Well, NOW I thought it was a good idea! 🙂 Though it was hard to let go of the painting details I wanted to do (pink showing through on the belly, whites in the eyes…). I went online again, and found a metallic finish in a water-based acrylic solution that got good reviews, called Sophisticated Finishes. I chose their blackened bronze, and H managed to find it for me at Michael’s. It was exciting painting it on! The coverage was amazing, like painting with liquid bronze! I did one layer of their sealer as well, for a final effect of a big bronze casting, very shiny, with the pinkish highlights and greenish-black shadow tones of bronze. Or dark chocolate. Well, either way, pretty good!
Here’s the final product.


A little closer up on the face:
Buddy is a cute little guy. I get to meet him and his mom in person in October, and I can’t wait!
Hope you enjoyed the ride with me. I love comments! Like, suggestions what to do with these extra dog heads!
5 Responses
Really wonderful work! Think that the second head is perfect. It is possible to make a bust/statue of the other dog head mounted on a pedestal?
Thanks! 🙂
I could mount the head (or heads) on a pedestal/s, but I still think it would look weird. Why weirder than a bust of a human? Wrong angle, maybe. But that might work better than a plaque … Thanks for the idea!
Your yorkie is cute, by the way. 🙂
If you’ve got lots of heads “leftover”, you could mount them, but like a big game hunter would. Could make for a fun exhibit…
That’s true! Putting them all up in a grouping would be funny, rather than just one odd head on the wall. Good idea!
Xan! Buddy’s sculpture came yesterday and we love it! It’s absolutely amazing. And it’s exactly the same size as he! Thank you sooo much. Lots of photo opportunities coming up this weekend….. 🙂